Close up body project
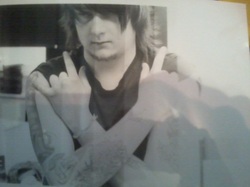
The photo on the left is my enlargement test of Adam. This is one of my favourite close up images because of Adams tattoos and I like how his hair covers most of his eyes. To me this photo gives off a type of 'Punk Rock' look which I was really going for.
After the testing I decided to expose the image for 6 seconds. I found this really bought out Adams arms and hands but also really darkened up his hair. After this image I had a few goes and trying film burns on it to darken up the background even more although in the end I preferred it without the film burns.
After the testing I decided to expose the image for 6 seconds. I found this really bought out Adams arms and hands but also really darkened up his hair. After this image I had a few goes and trying film burns on it to darken up the background even more although in the end I preferred it without the film burns.
London contact print
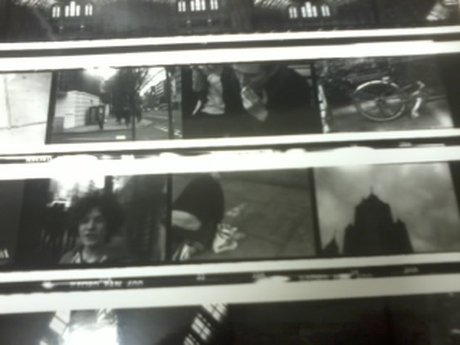
This contact print is the second one I have ever done and I am very pleased with the results. After getting used to the camera, In particular the white balance settings my pictures started to become more crisp. The viewfinder on the camera I was using was also really clear with only minor specs of dust which did not effect my view. This allowed to get my focus just about spot on. The camera I used for my first ever go with a SLR was very damaged so it proved difficult getting my focus right, this concluded with all of my photos bar 3 out of focus. In the contact print above I tried to be more unique with my camera angles, taking pictures of things from a different perspective to many other people. My favourite photo in the contact print is the man drawing Big Ben outside the V&A Museum. It is my favourite because I like how the man is in focus and the drawing is slightly out, I tried to do this to emphasize what the man is doing drawing our attention to him.
First contact print
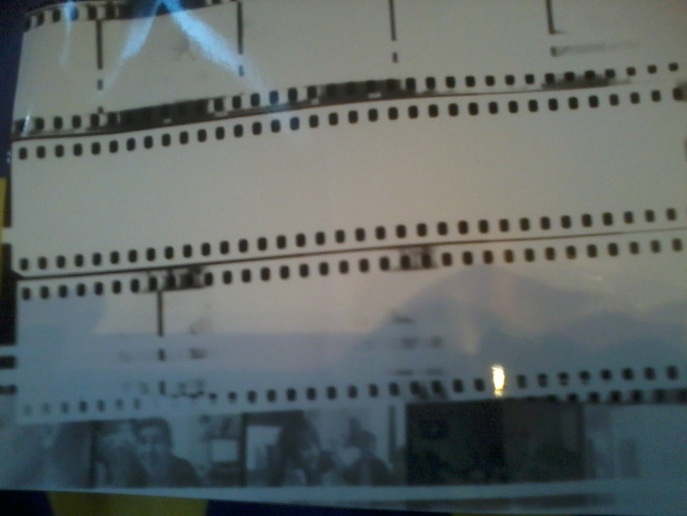
As you can see my first contact print wasn't a great success. Two things that you can clearly see is that all of the photos apart from a few at the bottom are over exposed and the negatives are overlapping. The reason they are overlapping is because the contact frame wasn't clipping down properly so they moved around slightly while putting the negatives under the light in the enlarger. The over exposed images are due to the fact that I did not put enough light on when using the enlarger. The white lines you can see on the 3rd negative down is because of the negatives moving out of position in the contact frame.
To improve, when I next make a contact print I will make sure I use a reliable contact frame which is in working order. I will make sure I go through the process slowly so I do not make any silly mistakes which could ruin my final outcome.
To improve, when I next make a contact print I will make sure I use a reliable contact frame which is in working order. I will make sure I go through the process slowly so I do not make any silly mistakes which could ruin my final outcome.
